Prerequisites to running one or many aponix barrels
The aponix barrels and components are meant to be versatile building blocks that can be used to set up grow spaces for new or existing farming plots. It works and is integrated just like a normal 2D NFT system – but in a much more flexible way empowering users to also make use of the z-axis of their grow space.
You might also want to check out the key features of the aponix platform and the decision process/configuration pages in order to understand how aponix vertical barrels are meant to be assembled and run.
To set up multiple vertical barrels…
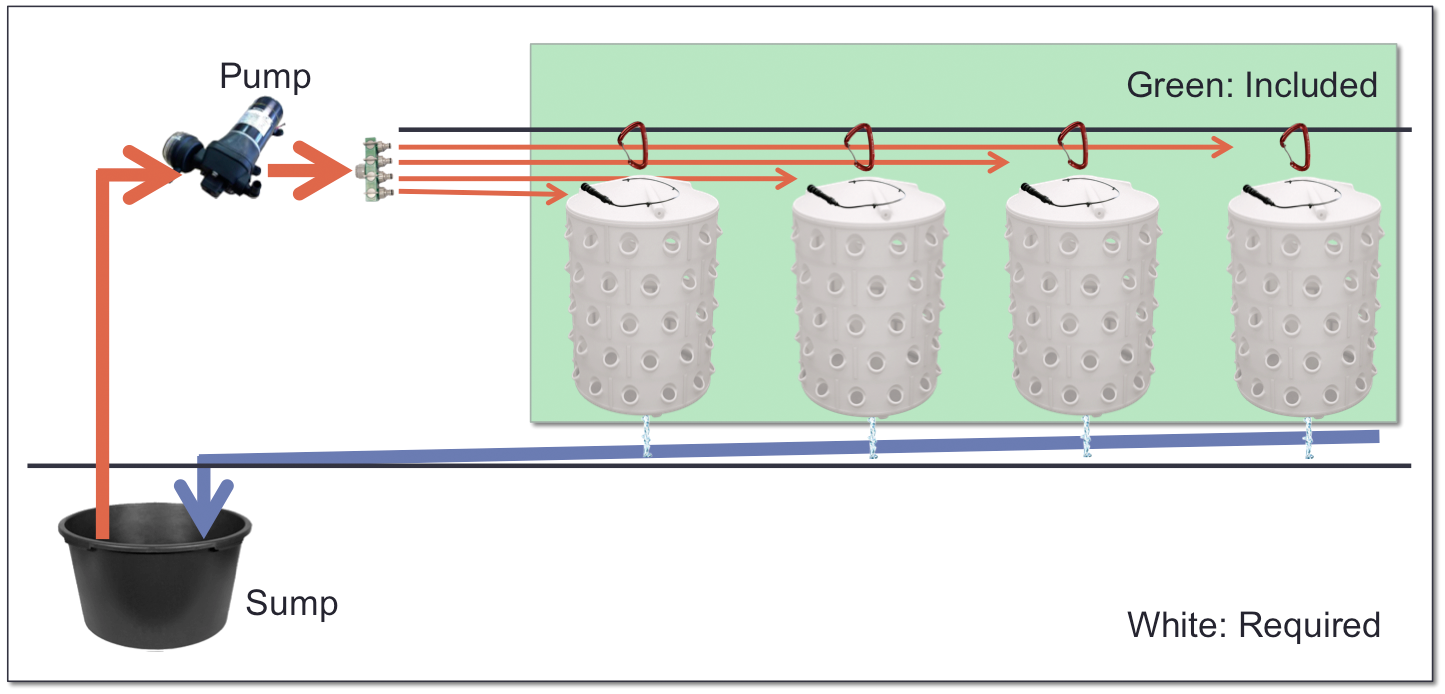
- … you can use an existing nutrient cycle either using hydroponics (with mineral fertilizer) or aquaponics (using organic fertilizer from fish). You need needs liquid nutrients.
- … you will need a pump (with or without pressure) to power the included irrigation (spray nozzle for aeroponics, sprinkler or for low pressure use our top water buffer for vertical drip irrigation or our Netafim micro adapter) to deliver nutrient solution to the the tops of your aponix barrel units and consequently to the roots of your plants.
- … you will need a suitable lighting situation for your plants to thrive either using natural sunlight from a greenhouse or artificial plant lighting or also a mix.
- … please make also sure that all other surrounding conditions for optimal plant growth are adequate. Depending on your crop – air flow root temperature, availability of CO2, sufficient aeration in your liquid, shading if necessary and protection from pest etc.
- … you will need to do the plumbing yourself or with the help of a local expert or experienced grower to return the liquid to your cycle. Usually liquid drains at the bottom of your barrels and needs to be diverted to your sump tank or reservoir preferably just by using gravity. It might be a good solution if you put pipes and/or your central reservoir below the ground level to keep it cool and out of the way.
Examples:
The setup here is using our lid-base + lid combination as bottom. With that you can use the lid-base to fix a 40mm PVC draining pipe underneath. The additional inserted lid serves as base and draining area for the unit stacked on top of it.
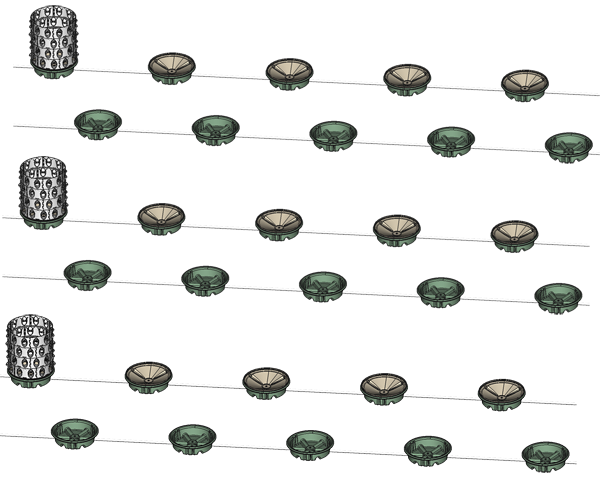
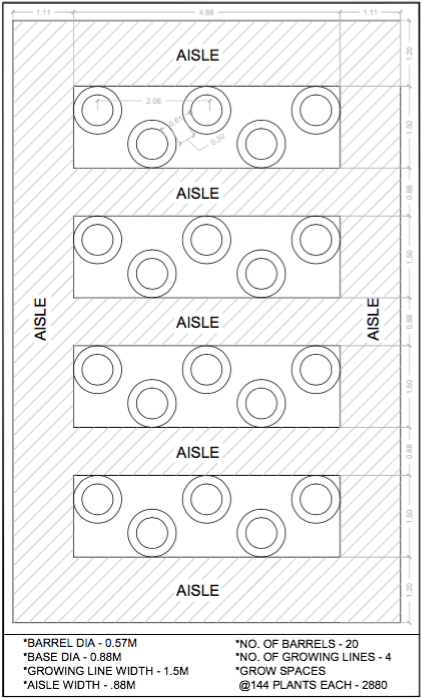
The net density of plants in your cultivation area that can be achieved using our vertical modular barrel is depending on the planned design of your farm. Variables: Planned height and arrangement/positioning of the barrel units in your production setup. Example:
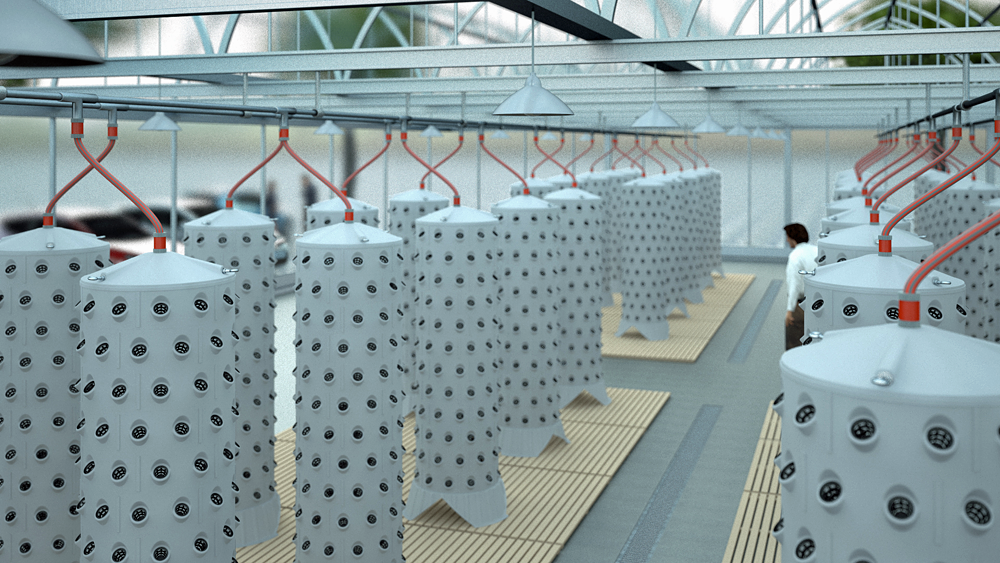
This sketch is the basis for this rendering.
Facility design depends very much on the individual circumstances and preconditions of the site. We recommend you also talk to an experienced planning expert to get the details right to integrate our vertical grow space solution smoothly into a larger production facility.
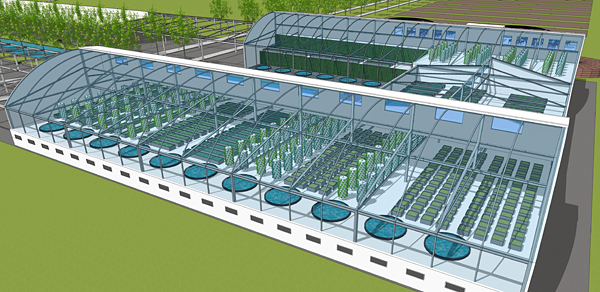
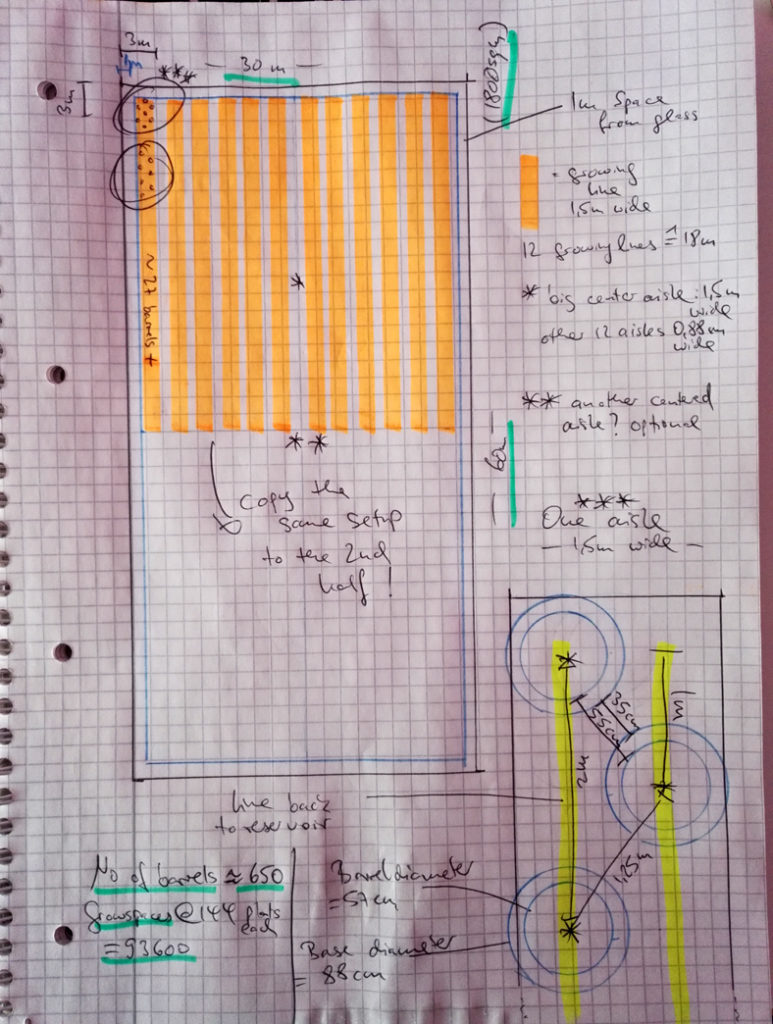
A larger example using a 30x60m (1800sqm) greenhouse
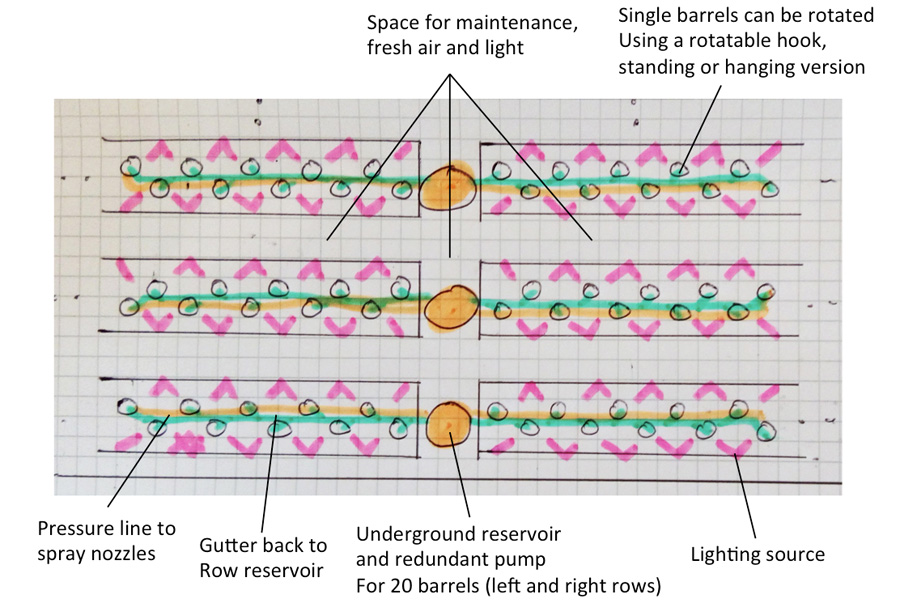
Here is another raw sketch that as an example of a cultivation area setup using aponix vertical barrels:
We left a space of 1m from the glass all around the production. The orange areas are the main production lines where the barrels are set up.
On the bottom right we see the more detailed view of an orange area. The yellow lines represent the gutter or liquid lines back to the reservoir. The liquid exiting the barrels on the bottom just falls into the gutter and travels back by gravity using a slope of 1-2%. The idea is to be able to change the distance of the barrels between each other any time it is necessary, increasing or decreasing the density of barrels.
As a result we have +27 barrels for a production line that runs half through the greenhouse (+54 barrels along the whole 58m long, 1,5m wide line), assuming we would have a larger center pathway in between the 2 blocks. You find more detailed metrics in handwriting on the sketch. We also assumed, that this greenhouse is only used for the cultivation of plants and that packaging, cooling, storage, reservoir etc is located somewhere else.
The big variables with which can be played in this setup is:
a) The number of barrels because the distance between them in a line is flexible, and
b) the height of the barrels which we assumed 12 ring segments (each 15cm high plus 25cm for lid and base combined) by just adding more ring segments resulting in higher barrels.
The area would host ~650 barrels holding 93600 grow spaces using 12 ring segments (=144 grow spaces) per barrel.
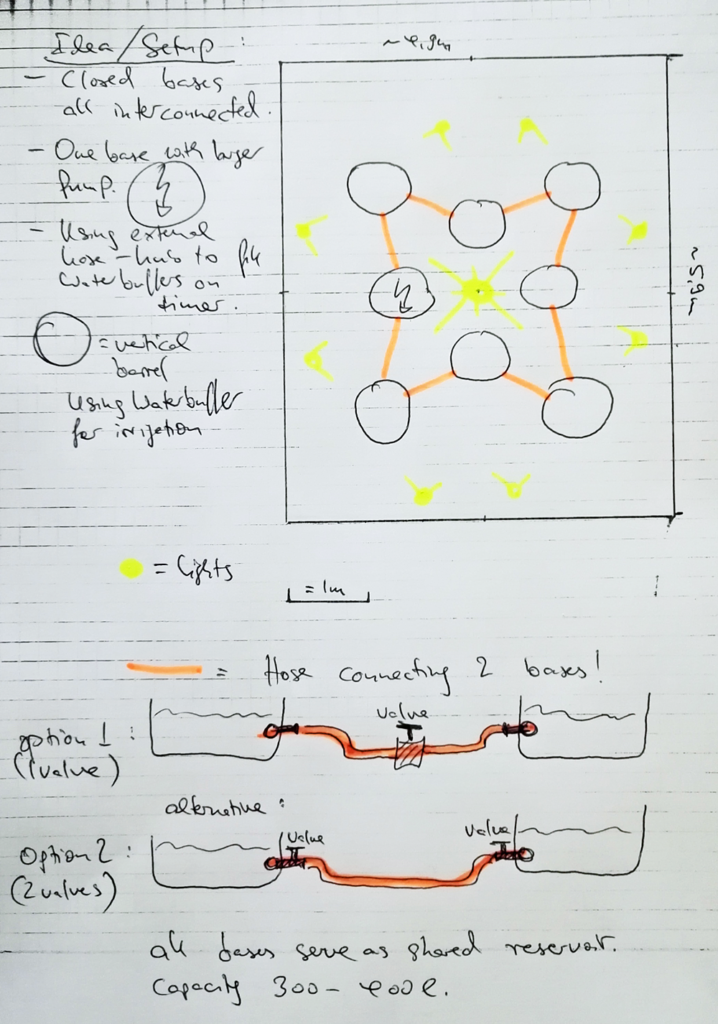
Special arrangement: connecting all closed bases into one ‘communicating’ reservoir:
The versatility of the aponix platform can be seen from this special setup. It can be used with any number of vertical barrels as long as the ones grown crop are connected to the other ‘active’ vertical barrels. As base we use multiple interconnected standalone barrel setups. The closed standing bases are all interconnected with a 3/4-inch hose. Each base is equipped with two valves that can connect them with other closed bases via hose (see ‘option 2’ on the sketch below). To disconnect the operator just closes the valve and disconnects the hose.
Some more setup examples: